 By Naomi Caldwell · Published · 1368 words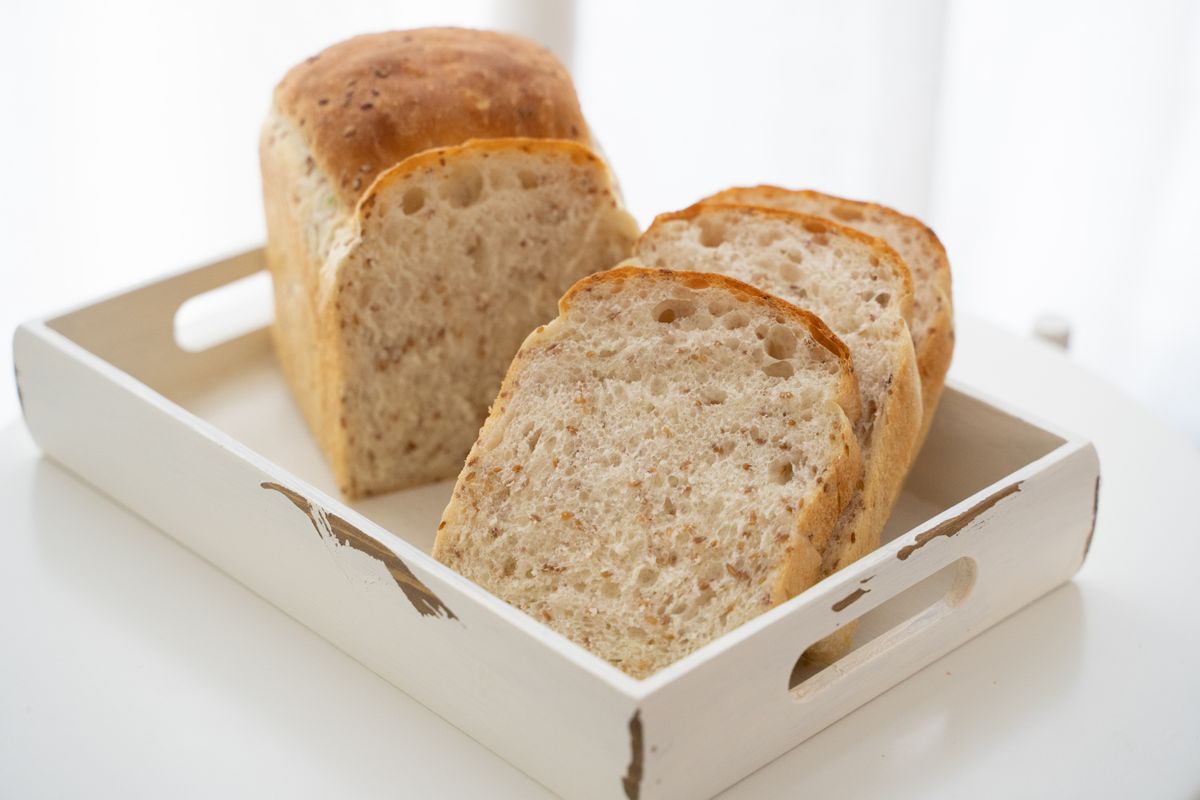
Store-bought gluten-free bread is small, expensive, and dry by day two, and most homemade attempts crumble the moment they meet a butter knife. It does not have to be that way. This gluten-free bread recipe makes a full-size sandwich loaf with a soft, springy crumb that slices clean and holds together, and it does it with one bowl, no kneading, and no gums. The two levers are the same ones I lean on for every gluten-free bake: psyllium husk for structure, and patience at two key moments, the proof and the cooling rack.
Quick answer: To make gluten-free bread, whisk a rice-flour-based gluten-free blend with psyllium husk powder, yeast, salt, and sugar, then stir in warm water and olive oil to form a thick, sticky dough. Let the psyllium hydrate for 10 minutes, shape the dough into a loaf pan, proof for about an hour, and bake at 400°F for about an hour until the center reads 205–210°F. Cool the loaf completely before slicing, because gluten-free bread sets its crumb as it cools.
How do you make gluten-free bread?
The method looks like regular yeast bread with two extra pauses: a 10-minute hydrate so the psyllium can gel, and a full cool-down before the first slice. Here is the complete recipe for one 9x5-inch loaf.
- 400 g (3 1/4 cups) gluten-free all-purpose flour blend (rice-flour based)
- 25 g (3 tbsp) psyllium husk powder
- 9 g (2 3/4 tsp) instant yeast
- 8 g (1 1/2 tsp) fine salt
- 15 g (1 tbsp) sugar
- 480 ml (2 cups) warm water
- 25 g (2 tbsp) olive oil, plus more for the pan
- Whisk the dry ingredients. Combine the gluten-free flour, psyllium husk, yeast, salt, and sugar in a large bowl so the psyllium is evenly distributed before any water hits it.
- Mix and hydrate, 10 minutes. Stir in the warm water and olive oil until no dry pockets remain, then let the dough sit for 10 minutes. It will thicken from a batter into a soft, sticky, shapeable dough as the psyllium gels.
- Shape into the pan. Scrape the dough into a greased 9x5 loaf pan and smooth the top with wet hands, doming it slightly down the center.
- Proof for 60 minutes. Cover loosely and leave somewhere warm until the dough looks puffy and has risen close to the rim. Gluten-free dough will not double the way wheat dough does; a clear rise is enough.
- Bake for 60 minutes at 400°F. Bake until the crust is deep golden and a thermometer in the center reads 205–210°F. If the top browns fast, tent it with foil for the last 20 minutes.
- Cool completely before slicing. Turn the loaf out onto a rack and leave it alone until it is fully cool. Cutting early is the number one cause of a gummy crumb.
What is the best flour for gluten-free bread?
A rice-flour-based gluten-free all-purpose blend is the most reliable base, which is exactly what most 1-to-1 gluten-free flours are. Rice flour brings neutral flavor and sturdy structure, and the starches blended with it add lift and softness. Our gluten-free flour guide breaks down the ratios if you want to mix your own from white rice flour, and the rice flour guide explains why it anchors nearly every commercial blend. For a deeper dive into loaf-specific blends, see our gluten-free bread flour guide.
For a more whole-grain loaf, swap up to a quarter of the blend for sorghum, buckwheat, or teff flour. All three add real flavor and minerals, and teff in particular gives the crumb a warm, wheaty color that makes gluten-free bread look less pale.
Why does gluten-free bread need psyllium husk?
Because a loaf has to trap far more gas than a pizza crust or a pancake, and nothing gluten-free traps gas like psyllium. Psyllium husk absorbs many times its weight in water and forms an elastic gel that stands in for gluten, holding the rise, keeping the crumb moist for days, and letting slices bend instead of shattering. Xanthan gum cannot do this at loaf scale, which is why gum-based breads crumble. Our psyllium husk baking guide covers the science and ratios; for bread you want a fine psyllium husk powder milled for baking, which disappears into the crumb instead of leaving flecks.
If you have whole psyllium husks rather than powder, use about a third more by volume, and expect a slightly coarser crumb.
How do you know when gluten-free bread is done?
Take its temperature: the center of the loaf should read 205–210°F on an instant-read thermometer. Gluten-free dough carries more water than wheat dough, so a golden crust routinely hides an underbaked center, and the thump test that works on wheat loaves lies here. If you do not own a thermometer, bake to the full hour at 400°F, tent with foil if the top darkens early, and err on the side of longer. An extra five minutes will not dry this loaf out, but five minutes short will leave a gummy stripe through the middle.
Why is my gluten-free bread gummy or dense?
The four usual causes, in order of likelihood, are slicing too early, underbaking, measuring flour by volume, and tired yeast. Warm gluten-free bread is still setting its starches, so cutting early smears the crumb into gum; give it the full cool-down. Underbaking leaves the same dense stripe, which the thermometer target above fixes. Measuring by cups instead of grams can put 20 percent extra flour in the bowl and turn the loaf into a brick, so weigh the flour and the psyllium. And instant yeast older than its date will proof slowly or not at all; when in doubt, buy a fresh packet. Our gluten-free pizza crust recipe leans on the same fixes if flatbreads are giving you the same trouble.
Where to go from here
One good loaf changes the math of eating gluten-free, because breakfast toast, sandwiches, and crumbs for cooking all stop depending on the expensive store-bought brick. Pair this loaf with the ideas in our gluten-free breakfast guide, and if you are stocking the pantry, the gluten-free grains guide maps every naturally safe grain worth keeping, from quinoa to sorghum. The Celiac Disease Foundation keeps the definitive list of what is safe if you are baking for someone newly diagnosed. Master the psyllium hydrate and the patient cool-down, and every other gluten-free bake gets easier.
Frequently asked questions
Is sourdough bread gluten free?
No. Traditional sourdough is made from wheat, and fermentation reduces but does not remove its gluten, so it is not safe for celiac disease. A true gluten-free sourdough must be built from a gluten-free flour starter, usually brown rice.
Can I make this gluten-free bread in a bread machine?
Yes, on a gluten-free or single-rise cycle: add the wet ingredients first, then the dry, and let the machine handle the proof and bake. Our bread machine picks include models with dedicated gluten-free cycles, and our bread machine recipes guide has the master method and the heritage tweaks.
Can I freeze gluten-free bread?
Yes, and it freezes better sliced. Cool the loaf fully, slice it, and freeze with parchment between slices so you can toast one at a time straight from the freezer.
Can I use this dough to make rolls instead of a loaf?
Yes. Divide the dough into 8 to 10 wet-shaped rounds, proof for about 40 minutes, and bake at the same temperature for 25 to 30 minutes until deep golden.
Get the binder that makes real bread possible
Psyllium husk powder is the difference between a loaf that slices and one that crumbles. Fine-milled baking psyllium is the one to buy.
Shop psyllium husk →Stock your gluten-free pantry
Rice flour, sorghum, teff, and the rest of the naturally gluten-free grains and flours we trust for baking.
Browse all grains →